What’s the biggest fear when renovating? It’s the fear of endless delays, the hassle of leveling the subfloor, the worry of warping or cracking after installation, and—most of all—the fear that you won’t be able to install it yourself.
If you’re looking for a flooring material that’s easy to install, requires no complicated tools, and delivers results comparable to professional installation, then SPC flooring is the answer.
With its unique click-lock system, SPC flooring has completely revolutionized traditional flooring installation—no glue, no subfloor joists, and not even professional installers are needed. By following the three steps below, you can easily renovate the flooring in an entire room, achieving a truly fast setup and perfect finish.
In this article, we’ll break down every detail of SPC flooring installation from scratch, while explaining why it’s increasingly regarded as a “time-saving marvel” in both residential and commercial projects.
What is SPC flooring? Why is the click-lock system a revolutionary design?
SPC flooring stands for Stone Plastic Composite flooring. It is formed through high-temperature, high-pressure co-extrusion using natural limestone powder, PVC resin, and stabilizers. Its core structure includes:
UV-resistant wear layer (scratch-resistant, UV-resistant)
Decorative layer (high-definition wood grain, stone patterns)
SPC core layer (waterproof, moisture-resistant, formaldehyde-free)
Sound-absorbing underlayment (optional, enhances underfoot comfort)
The click-lock system is one of the most significant innovations in SPC flooring. Through a precisely engineered interlocking design, adjacent planks snap together like puzzle pieces, requiring no glue or nails. This design offers three major benefits:
Zero technical barrier – Anyone can install it without professional training
Removable and reusable – Individual planks can be replaced when moving or in case of localized damage
Perfectly suited for underfloor heating – The locking structure allows the flooring to naturally expand and contract with temperature changes, preventing cracks
Three-Step Guide to Installing SPC Flooring with Click-Lock
No specialized tools are required; all you need is a utility knife, a rubber mallet, and a tape measure.
Step 1: Floor Preparation
Although SPC flooring has less stringent subfloor requirements than traditional flooring, following these three steps will ensure a more durable installation:
Cleaning: Sweep away dust and debris, and use a vacuum cleaner to clean corners.
Levelness Check: Use a 2-meter straightedge to check for unevenness. Repair any areas with a height difference exceeding 3mm using self-leveling cement.
Moisture Barrier: If installing on the ground floor or in a basement, we recommend laying a moisture barrier (0.2mm PE film) and sealing the overlaps with tape.
💡 Tip: Before installing SPC flooring, let the planks acclimate at room temperature for 24 hours to allow the material to fully adjust to the ambient temperature and humidity, preventing minor expansion or contraction later on.
Step 2: Laying and Locking the Planks
Determine the starting edge: Typically, begin at the longest wall of the room and lay the planks from left to right. Leave an 8–10mm expansion gap for the first row.
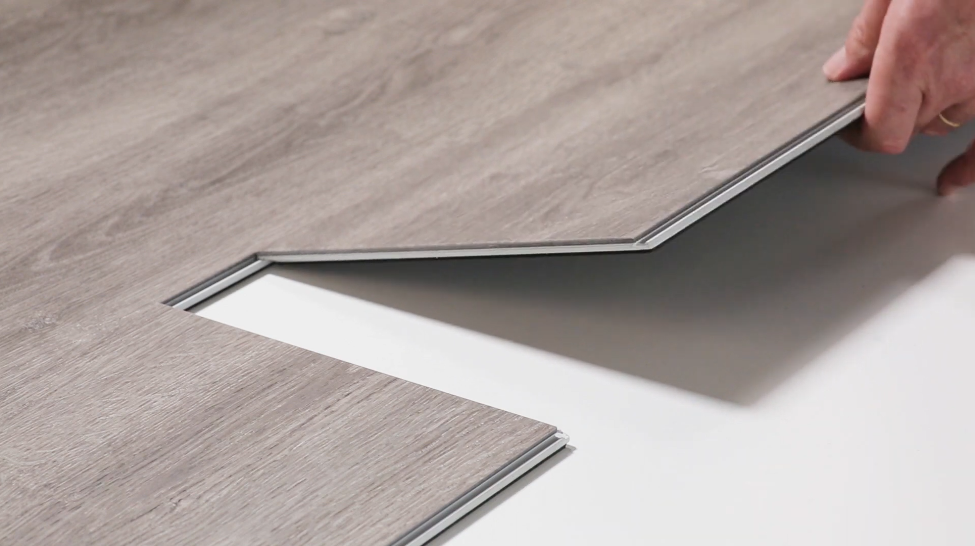
Connecting the First Row: Align the tongue on the short side of the first plank with the groove on the second plank. Insert at a 30° angle, then press down firmly until you hear a “click” to secure the connection. Continue laying the first row in this manner.
Second Row and Beyond:
The first plank of the second row should start 1/3 of the way along the length of the first plank in the first row.
Insert the long-edge click-lock of the second-row plank into the groove of the first-row plank at a 25–30° angle, then press down gently; the click-lock will engage automatically.
Gently tap the edges of the installed planks with a rubber mallet to ensure the click-locks are fully engaged and any gaps disappear.
Handling the final row: Measure the remaining width and cut the planks using a utility knife or electric saw.
🔧 Key Tip: If encountering irregular areas such as door frames or pipes, first create a template using cardboard, then trace the template onto the flooring and cut along the lines. This will not affect the locking mechanism.
Step 3: Finishing Touches
Remove the expansion gap wedges from the starting edge.
Install baseboards or edge trim to cover the expansion gaps. We recommend using PVC baseboards in a color matching the flooring; they can be installed using snap-on fittings.
Fill the gaps at doorways and thresholds with silicone sealant.
With this, the installation of SPC flooring throughout the entire room is complete. There is no need to wait for the adhesive to dry; you can walk on the floor immediately after installation.
We have specialized in the R&D and production of SPC flooring for many years. Every plank is certified under the ISO 9001 Quality Management System and holds CE and FloorScore environmental certifications. Our click-lock system has passed 100,000 fatigue tests and still maintains a tight, secure fit.